
s50
Desktop environment installation.
Install a desktop environment.
[root@www ~]# 50_1dnf -y group install "Basic Desktop" GNOME
s51Start Desktop. (Since the terminal may freeze after setting, please open the terminal again and proceed with the setting.)
[root@www ~]# 51_1startx
s52Make login settings.
[root@www ~]# 52_1systemctl set-default graphical.target
[root@www ~]# 52_2systemctl set-default
[root@www ~]# 52_3ll /etc/systemd/system/default.target
s53Restart.
[root@www ~]# 53_1reboot

s54Note: Install either VNC server or Xrdp server. If both are installed, it may not be displayed. Xrdp server is recommended.s55
Setting up a VNC server.
Install a VNC server.
root@www:~# 55_1dnf -y install tigervnc-server
s56Log in as the user for whom you want to set the VNC connection, and set a password (up to 8 alphanumeric characters) on the VNC server.
root@www:~# 56_1vncpasswd
Password:
Verify:
Would you like to enter a view-only password (y/n)? 56_2n
s57Create a VNC server configuration file.
root@www:~# 57_1vi ~/.vnc/config
57_2session=gnome
securitytypes=vncauth,tlsvnc
geometry=800x600
s58Make the VNC server available with root privileges.
root@www:~# 58_1vi /etc/tigervnc/vncserver.users
# TigerVNC User assignment
#
# This file assigns users to specific VNC display numbers.
# The syntax is <display>=<username>. E.g.:
#
# :2=andrew
# :3=lisa
58_2:1=root
:2=webmaster
s59Start a VNC server.
root@www:~# 59_1systemctl enable --now vncserver@:1 vncserver@:2
s60Restart
root@www:~# 60_1reboot
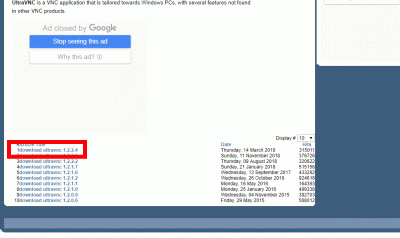
s61Download UltraVNC_1_2_40_X64_Setup.exe of UltraVNC to the client PC. (There is a download link at the bottom of the page.)
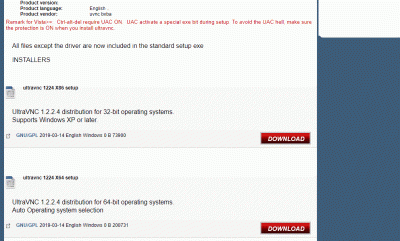
s62Select 32bit, 64bit and click “DOWNLOAD”.
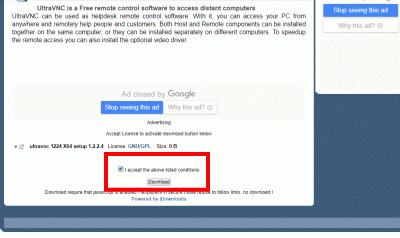
s63Select “I accept the above listed conditions” and click “Download”.
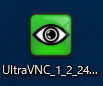
s64Double-click the downloaded “UltraVNC_***_Setup.exe” icon to install.
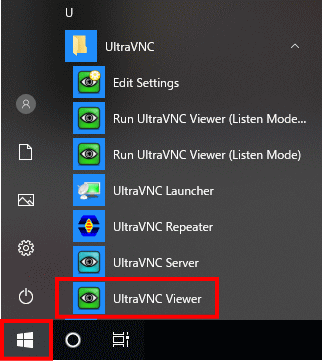
s65Click “Windows Start Menu” and start “UltraVNC Viewer”.
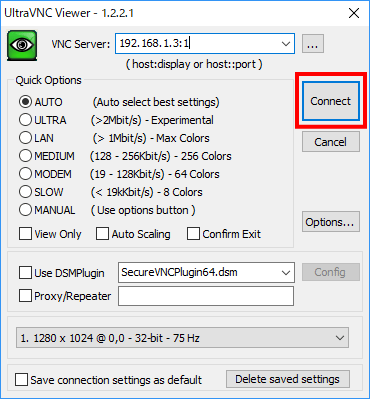
s66Enter the IP address of the VNC server you started earlier: Display number and click “Connect”.
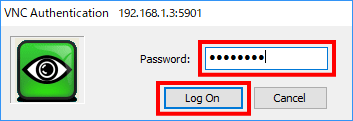
s67Enter your VNC password and click Log on.
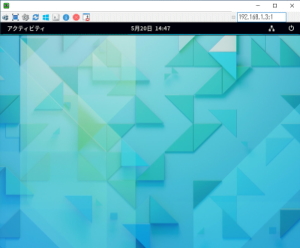
s68Your desktop will appear.
s69
Xrdp server settings.
Install and configure the Xrdp server so that you can connect using the Windows remote desktop function.
[root@www ~]# 69_1dnf -y install xrdp tigervnc-server
s70Set autostart.
[root@www ~]# 70_1systemctl enable --now xrdp
s71From the Windows Start menu, select “Accessories” → “Remote Desktop Connection” to launch the connection screen.

s72Enter the server IP address and click “Connect”.
s73Enter “usermame” (user name), “password” (password) and click “OK”.

s74Your desktop will appear.
s75
Japanese environment settings.
Install the Japanese environment package.
[root@www ~]# 75_1dnf -y install ibus-kkc vlgothic-*
s76Sets the system character set.
[root@www ~]# 76_1localectl set-locale LANG=ja_JP.UTF-8
[root@www ~]# 76_2source /etc/locale.conf
s77Check your settings.
[root@www ~]# 77_1echo $LANG
ja_JP.UTF-8