Nagiosのインストール
nagiosユーザーを作成します。
root@www:~# useradd -d /usr/local/nagios/ -M nagios
Nagiosをダウンロードします。
root@www:~# wget https://downloads.sourceforge.net/project/nagios/nagios-4.x/nagios-4.2.4/nagios-4.2.4.tar.gz
Nagiosを展開します。
root@www:~# tar zxvf nagios-4.2.4.tar.gz
Nagios展開先ディレクトリへ移動します。
root@www:~# cd nagios-4.2.4
Nagios日本語化パッチをダウンロードします。
root@www:nagios-4.2.4# wget http://ftp.momo-i.org/pub/security/nagios/patches/nagios-jp-4.2.4.patch.gz
Nagios日本語化パッチを施行します。
root@www:nagios-4.2.4# gzip -dc nagios-jp-4.2.4.patch.gz |patch -p1
Nagiosをインストールします。
root@www:nagios-4.2.4# ./configure && make all && make fullinstall && make install-config
ディレクトリを抜けます。
root@www:nagios-4.2.4# cd
Nagios展開先ディレクトリを削除します。
root@www:~# rm -rf nagios-4.2.4
ダウンロードしたファイルを削除します。
root@www:~# rm -f nagios-4.2.4.tar.gz
Nagiosプラグインインストール
mysql-clientをインストールします。
root@www:~# apt -y install mysql-client
libmysqlclient-devをインストールします。
root@www:~# apt -y install libmysqlclient-dev
Nagiosプラグインをダウンロードします。
root@www:~# wget https://nagios-plugins.org/download/nagios-plugins-2.1.4.tar.gz
Nagiosプラグインを展開します。
root@www:~# tar zxvf nagios-plugins-2.1.4.tar.gz
Nagiosプラグイン展開先ディレクトリへ移動します。
root@www:~# cd nagios-plugins-2.1.4
Nagiosプラグインをインストールします。
root@www:nagios-plugins-2.1.4# ./configure && make && make install
ディレクトリを抜けます。
root@www:nagios-plugins-2.1.4# cd
Nagiosプラグイン展開先ディレクトリを削除します。
root@www:~# rm -rf nagios-plugins-2.1.4
ダウンロードしたファイルを削除します。
root@www:~# rm -f nagios-plugins-2.1.4.tar.gz
Nagios設定
nagios.cfgを設定します。
root@www:~# vi /usr/local/nagios/etc/nagios.cfg
51行目:行頭の「#」を削除してコメント解除し、サーバー監視設定有効化の設定します。
cfg_dir=/usr/local/nagios/etc/servers
1094行目:日付書式をYYYY-MM-DD HH:MM:SSにするを設定します。
date_format=iso8601
サーバー監視設定ファイル格納ディレクトリを作成します。
root@www:~# mkdir /usr/local/nagios/etc/servers
contacts.cfgを設定します。
root@www:~# vi /usr/local/nagios/etc/objects/contacts.cfg
34行目:管理者メールアドレスを指定を設定します。
define contact{
        contact_name                    nagiosadmin             ; Short name of user
        use                             generic-contact         ; Inherit default values from generic-contact template (defined above)
        alias                           Nagios Admin            ; Full name of user

        email                           root@localhost
        }
localhost.cfgを設定します。
root@www:~# vi /usr/local/nagios/etc/objects/localhost.cfg
141行目:SSH状態変化時に通知するを設定します。
define service{
        use                             local-service         ; Name of service template to use
        host_name                       localhost
        service_description             SSH
        check_command                   check_ssh
        notifications_enabled           1
        }
154行目:SSH状態変化時に通知するを設定します。
define service{
        use                             local-service         ; Name of service template to use
        host_name                       localhost
        service_description             HTTP
        check_command                   check_http
        notifications_enabled           1
        }
commands.cfgを設定します。
root@www:~# vi /usr/local/nagios/etc/objects/commands.cfg
29行目:nkfコマンドのメール本文文字化け対策の設定します。
# 'notify-host-by-email' command definition
define command{
        command_name    notify-host-by-email
        command_line    /usr/bin/printf "%b" "***** Nagios *****\n\nNotification Type: $NOTIFICATIONTYPE$\nHost: $HOSTNAME$\nState: $HOSTSTATE$\nAddress: $HOSTADDRESS$\nInfo: $HOSTOUTPUT$\n\nDate/Time: $LONGDATETIME$\n" | /usr/bin/nkf -j | /bin/mail -s "** $NOTIFICATIONTYPE$ Host Alert: $HOSTNAME$ is $HOSTSTATE$ **" $CONTACTEMAIL$
        }
35行目:nkfコマンドのメール本文文字化け対策の設定します。
# 'notify-service-by-email' command definition
define command{
        command_name    notify-service-by-email
        command_line    /usr/bin/printf "%b" "***** Nagios *****\n\nNotification Type: $NOTIFICATIONTYPE$\n\nService: $SERVICEDESC$\nHost: $HOSTALIAS$\nAddress: $HOSTADDRESS$\nState: $SERVICESTATE$\n\nDate/Time: $LONGDATETIME$\n\nAdditional Info:\n\n$SERVICEOUTPUT$" | /usr/bin/nkf -j | /bin/mail -s "** $NOTIFICATIONTYPE$ Service Alert: $HOSTALIAS$/$SERVICEDESC$ is $SERVICESTATE$ **" $CONTACTEMAIL$
        }
Apache2設定
Nagios用Apache2設定ファイルを設定します。
root@www:~# vi /etc/apache2/sites-available/nagios.conf
16行目:追記します。
<RequireAny>
17行目:行頭に「#」を追記してコメント化し、内部からのみアクセス可能にする設定をします。
# Require all granted
19行目:内部ネットワーク(192.168.1.1/24)からのみアクセス可能にする設定をします。
Require ip 192.168.1.1/24
20行目:追記します。
</RequireAny>
49行目:追記します。
<RequireAny>
50行目:行頭に「#」を追記してコメント化し、内部からのみアクセス可能にする設定をします。
# Require all granted
52行目:内部ネットワーク(192.168.1.1/24)からのみアクセス可能にする設定をします。
Require ip 192.168.1.1/24
53行目:追記します。
</RequireAny>
Webサーバー設定反映を設定します。
root@www:~# systemctl restart apache2
Nagios管理ユーザー(nagiosadmin)を作成します。
root@www:~# htpasswd -c /usr/local/nagios/etc/htpasswd.users nagiosadmin
パスワードを設定します。
New password:
Re-type new password:
Adding password for user nagiosadmin
Nagios起動
起動します。
root@www:~# systemctl restart nagios
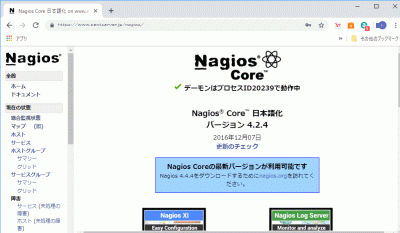
Webブラウザを起動し、「http://ubuntuserver.jp/nagios/」にアクセスし、管理ユーザー:nagiosadmin、登録済パスワードでログインして動作確認をします。


コメント