
s50
rootファイルシステムを拡張.
最上層部( / )rootファイルシステムを確認、記録します。
[root@www ~]# 50_1df -h
ファイルシス             サイズ    使用  残り 使用% マウント位置
devtmpfs                   3.9G      0  3.9G     0% /dev
tmpfs                      3.9G      0  3.9G     0% /dev/shm
tmpfs                      3.9G   1.1M  3.9G     1% /run
/dev/fedora/fedora-root     15G   1.9G   14G    13% / #拡張
tmpfs                      3.9G   4.0K  3.9G     1% /tmp
/dev/sda1                  1014M  194M  821M    20% /boot
tmpfs                      783M      0  783M     0% /run/user/1000
s51rootファイルシステムはディフォルトで15Gb ですので拡張します。
記録した最上層部( / )のroot理論ボリュームを拡張します。(上記フォームにてご自身のファイルパスに変更してください。)
[webmaster@www ~]$ 51_1sudo lvextend -l +100%FREE /dev/fedora/fedora-root
s52記録した最上層部( / )のrootファイルシステムを拡張します。
[webmaster@www ~]$ 52_1sudo xfs_growfs /dev/fedora/fedora-root
s53
一般ユーザーの作成.
rootユーザーにログインします。
[webmaster@www ~]$ 53_1su -
パスワード:
[root@www ~]#
s54一般ユーザーを作成します。(初期設定では一般ユーザーは必要ありません。)
[root@www ~]# 54_1useradd ユーザー名
s55パスワードを設定します。
[root@www ~]# 55_1passwd ユーザー名
新しいパスワード:
新しいパスワードを再入力してください:
s56
rootになれるユーザーを限定.
rootになれるユーザーを限定します。
[root@www ~]# 56_1usermod -G wheel webmaster
[root@www ~]# 56_2vi /etc/pam.d/su
s57#を削除してコメント解除
#%PAM-1.0
auth            sufficient      pam_rootok.so
# Uncomment the following line to implicitly trust users in the "wheel" group.
#auth           sufficient      pam_wheel.so trust use_uid
# Uncomment the following line to require a user to be in the "wheel" group.
auth            required        pam_wheel.so use_uid
auth            substack        system-auth
auth            include         postlogin
account         sufficient      pam_succeed_if.so uid = 0 use_uid quiet
account         include         system-auth
password        include         system-auth
session         include         system-auth
session         include         postlogin
session         optional        pam_xauth.so
s58
一般ユーザーの削除.
ユーザーのみ削除する場合
[root@www ~]# 58_1userdel ユーザー名
s59ホームディレクトリも削除する場合
[root@www ~]# 59_1userdel -r ユーザー名
s60
ファイアウォールとSELinuxを無効化.
ファイアウォールサービスを停止します。
[root@www ~]# 60_1systemctl stop firewalld
s61自動起動設定を無効にします。
[root@www ~]# 61_1systemctl disable firewalld
rm '/etc/systemd/system/dbus-org.fedoraproject.FirewallD1.service'
rm '/etc/systemd/system/basic.target.wants/firewalld.service'
s62SELinux を無効にします。
[root@www ~]# 62_1vi /etc/selinux/config
s63disabled に変更します。
# This file controls the state of SELinux on the system.
# SELINUX= can take one of these three values:
# enforcing - SELinux security policy is enforced.
# permissive - SELinux prints warnings instead of enforcing.
# disabled - No SELinux policy is loaded.
SELINUX=63_1disabled #変更
# SELINUXTYPE= can take one of these two values:
# targeted - Targeted processes are protected,
# minimum - Modification of targeted policy. Only selected processes are protected.
# mls - Multi Level Security protection.
SELINUXTYPE=targeted
s64再起動します。
[root@www ~]# 64_1reboot
s65
ネットワークの設定.
IPv6 を無効にします。
[root@www ~]# 65_1vi /etc/default/grub
s666行目:「ipv6.disable=1」を追加します。
GRUB_CMDLINE_LINUX="66_1ipv6.disable=1 rd.lvm.lv=linuxserver/root..
s67変更を反映します。
[root@www ~]# 67_1grub2-mkconfig -o /boot/grub2/grub.cfg
[root@www ~]# 67_2reboot
s68
ルーター設定.
ルーターでDHCP固定IPアドレス設定ができる場合は「MACアドレス」、「サーバーIPアドレス」を設定します。
MACアドレス(例:0c:2e:48:2b:dg:f4)
サーバーIPアドレス:192.168.1.3
s69
システムの最新化.
システムを最新化します。
[root@www ~]# 69_1dnf -y update
s70
モジュールを追加.
Node.js 14をインストールします。
[root@www ~]# 70_1dnf module -y install nodejs:14
s71モジュールを確認します。
[root@www ~]# 71_1node -v
v14.14.0
s72Node.js をリセットします。
[root@www ~]# 72_1dnf module reset nodejs
s73Node.js 16をインストールします。
[root@www ~]# 73_1dnf module enable nodejs:16
[root@www ~]# 73_2dnf module -y install nodejs:16/common
s74モジュールを確認します。
[root@www ~]# 74_1node -v
v16.14.0
s75
パッケージ自動更新設定.
dnf-automaticをインストールします。
[root@www ~]# 75_1dnf install dnf-automatic dnf-utils -y
s76dnf-automaticを設定します。
[root@www ~]# 76_1vi /etc/dnf/automatic.conf
s77自動ダウンロード&自動アップデートを行うようにする
# Whether updates should be applied when they are available, by
# dnf-automatic.timer. notifyonly.timer, download.timer and
# install.timer override this setting.
apply_updates = 77_1yes #変更
s78パッケージ自動更新自動起動設定
[root@www ~]# 78_1systemctl enable --now dnf-automatic.timer
s79
Web 管理コンソールの設定.
Cockpit を有効にして Web 管理コンソールが利用可能にします。
[root@www ~]# 79_1systemctl enable --now cockpit.socket
[root@www ~]# 79_2ss -napt
State Recv-Q Send-Q Local Address:Port Peer Address:Port
LISTEN 0 128 0.0.0.0:22 0.0.0.0:* users:(("sshd",pid=831,fd=6))
LISTEN 0 128 [::]:22 [::]:* users:(("sshd",pid=831,fd=8))
LISTEN 0 128 *:9090 *:* users:(("systemd",pid=1,fd=24))
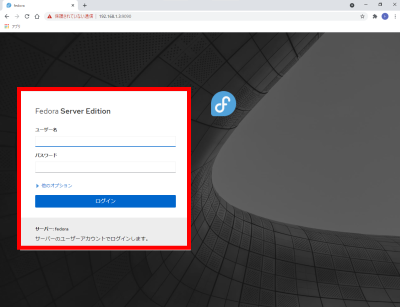
s80クライアントPCのWebブラウザで、 Web 管理コンソールへアクセスし「root」でログインします。
s81
Vim(テキストエディタ)の設定.
Vim(テキストエディタ)をインストールします。
[root@www ~]# 81_1dnf -y install vim-enhanced
s82コマンドエイリアスを適用します。
[root@www ~]# 82_1vi /etc/profile
s83最終行に追記します。
83_1alias vi='vim'
s84変更を反映します。
[root@www ~]# 84_1source /etc/profile
s85vim を設定します。
[root@www ~]# 85_1vi ~/.vimrc
s86行番号を表示する(サーバー設定を行番号で説明いたします。)
86_1set number
s87
Sudo(root権限)の設定.
root権限を特定のユーザーに設定します。
[root@www ~]# 87_1visudo
s88最終行に追記します。
88_1webmaster ALL=(ALL) ALL