Fedora35:バックアップ設定

バックアップ領域の作成

サーバーの電源を切ってHDD(メインHDDより容量の大きいもの)を追加しておきます。

Windows のリモートデスクトップ機能でサーバーに接続します。

「アクティビティ」→「アプリケーションを表示する」を選択します。

「ユーティリティ」を選択します。

「ディスク」を選択します。

「バックアップ用HDD」→「+」を選択します。

→「サイズを設定」→「名前を設定」→「作成」で初期バックアップ用(Defalt HDD Backup 20Gb)、システムバックアップ用(Sestem Backup)のパーティション作成します。

」をクリックしてマウントします。

自動バックアップの設定

アップデートします。

root@www:~# dnf update

timeshiftをインストールします。

root@www:~# dnf -y install timeshift

独自翻訳した日本語化ファイルを用意いたしました。

日本語化ファイル(timeshift.zip)をダウンロードし、解凍します。

解凍したファイル(timeshift.mo)をsambaのフォルダにコピーします。

「fedora」→「Share」にtimeshift.moをペーストします。

timeshift.moをペースト

Windows のリモートデスクトップ機能でサーバーに接続します。

「アクティビティ」→「ファイル」→「samba/share/timeshift.mo」をコピーします。

「アクティビティ」→「ファイル」→「usr/share/locale/ja/LC_MESSAGES」へ貼付けます。

「アクティビティ」→「アプリケーションを表示する」を選択します。

「Timeshift」を選択します。

「RSYNC」を選択し、「次」をクリックします。

「Sestem Backup」を選択し、「次」をクリックします。

「毎日」を選択し、「次」をクリックします。

「次」をクリックします。

「完了」をクリックします。

「設定」をクリックします。

「ユーザー」をクリックし、「すべてのファイルを含める」を選択し「OK」をクリックします。

「作成」をクリックしスナップショットを作成します。

(リモートディスクトップで復元できない場合はサーバーにログインして復元します。)

Fedora35:デスクトップ環境設定

デスクトップ環境インストール

デスクトップ環境をインストールします。

[root@www ~]# dnf -y group install "Basic Desktop" GNOME

デスクトップを起動します。

[root@www ~]# startx

ログイン設定をします。

[root@www ~]# systemctl set-default graphical.target
[root@www ~]# systemctl set-default
[root@www ~]# ll /etc/systemd/system/default.target

再起動します。

[root@www ~]# reboot

注意:VNCサーバーかXrdpサーバーのどちらか一つをインストールしてください。両方インストールすると表示できない場合があります。おすすめはXrdpサーバーです。

VNCサーバーの設定

VNCサーバーをインストールします。

root@www:~# dnf -y install tigervnc-server

VNC 接続を設定したいユーザーでログインし、VNC サーバーでパスワード(英数字8桁以内)を設定します。

root@www:~# vncpasswd
Password:
Verify:
Would you like to enter a view-only password (y/n)? n

VNC サーバー設定ファイルを作成します。

root@www:~# vi ~/.vnc/config
session=gnome
securitytypes=vncauth,tlsvnc
geometry=800x600

root権限でVNC サーバーを利用できるようにします。

root@www:~# vi /etc/tigervnc/vncserver.users
# TigerVNC User assignment
#
# This file assigns users to specific VNC display numbers.
# The syntax is <display>=<username>. E.g.:
#
# :2=andrew
# :3=lisa
:1=root
:2=webmaster

VNC サーバーを起動します。

root@www:~# systemctl enable --now vncserver@:1 vncserver@:2

再起動します。

root@www:~# reboot

クライアントPCにUltraVNCUltraVNC_1_2_40_X64_Setup.exeをダウンロードします。(ページの下部にダウンロードリンクがあります。)

UltraVNCをダウンロード

23bit、64bitを選択して「DOWNLOAD」をクリックします。

23bit、64bitを選択して「DOWNLOAD」

「I accept the above listed conditions」を選択して「Download」をクリックします。

「I accept the above listed conditions」を選択して「Download」

ダウンロードした「UltraVNC_***_Setup.exe」のアイコンをWクリックしてインストールします。

UltraVNC_***_Setup.exe

「Windowsスタートメニュー」をクリックし、「UltraVNC Viewer」を起動します。

Windowsスタートメニュー

先に起動したVNCサーバーのIPアドレス:ディスプレイ番号を入力をして「Connect」をクリックします。

VNCサーバーのIPアドレス:ディスプレイ番号を入力

VNCパスワードを入力し「Log on」をクリックします。

VNCパスワードを入力

ディスクトップが表示されます。

Xrdpサーバーの設定

Windows のリモートデスクトップ機能で接続できるようにXrdpサーバーをインストールして設定します。

[root@www ~]# dnf -y install xrdp tigervnc-server

自動起動を設定します。

[root@www ~]# systemctl enable --now xrdp

Windows スタートメニューから「アクセサリ」→「リモートデスクトップ接続」 を選択して接続画面を起動します。

スタートメニュー

サーバーIPアドレスを入力し「接続」をクリックします。

サーバーIPアドレスを入力し「接続」をクリック

「usermame」(ユーザー名)、「password」(パスワード)を入力し「OK」をクリックします。

ディスクトップが表示されます。

日本語環境の設定

日本語環境のパッケージをインストールします。

[root@www ~]# dnf -y install ibus-kkc vlgothic-*

システムの文字セットを設定します。

[root@www ~]# localectl set-locale LANG=ja_JP.UTF-8
[root@www ~]# source /etc/locale.conf

設定を確認します。

[root@www ~]# echo $LANG
ja_JP.UTF-8

Fedora35:ファイルサーバー設定

sambaのインストール

sambaをインストールします。

[root@www ~]# dnf install samba samba-client samba-common -y

sambaの初期設定

sambaの設定ファイルをバックアップ。

[root@www ~]# mv /etc/samba/smb.conf /etc/samba/smb.conf.bk

sambaを設定します。

[root@www ~]# vi /etc/samba/smb.conf

ファイルを作成します。

[global]
workgroup = WORKGROUP
server string = Samba Server %v
netbios name = fedora
security = user
map to guest = bad user
dns proxy = no
ntlm auth = yes
#==========================================================
[Share]
#共有フォルダ
path = /samba/share/
#マイネットワークに表示の有無
browsable = yes
#書き込み許可
writable = yes
#ゲストユーザのログイン許可
guest ok = yes
#読込みの許可
read only = no
#ファイル属性
force create mode = 0777
#ディレクトリ属性
force directory mode = 0777

共有フォルダを作成します。

root@www:~# mkdir /samba
root@www:~# mkdir /samba/share
root@www:~# chown nobody:nobody /samba/share
root@www:~# chmod 0777 /samba/share

自動起動します。

[root@www ~]# systemctl enable --now smb.service
[root@www ~]# systemctl enable --now nmb.service

再起動します。

[root@www ~]# reboot

クライアントWindowsPCを再起動し、「ネットワーク」→「linux」→「Share」を開いて書き込みができることを確認します。(「ネットワーク」→「linux」が表示されない場合はディスクトップの任意の場所で右クリックで新規フォルダを作成して、その新規フォルダを右クリックしてショートカットを作成し、そのショートカットを右クリックしてプロパティを開いてリンク先を「\\linux」に変更し接続します。)

WindowsPC

Fedora35:初期設定

rootファイルシステムを拡張

最上層部( / )rootファイルシステムを確認します。

[root@www ~]# df -h

ファイルシス             サイズ    使用  残り 使用% マウント位置
devtmpfs                   3.9G      0  3.9G     0% /dev
tmpfs                      3.9G      0  3.9G     0% /dev/shm
tmpfs                      3.9G   1.1M  3.9G     1% /run
/dev/fedora/fedora-root     15G   1.9G   14G    13% / #拡張
tmpfs                      3.9G   4.0K  3.9G     1% /tmp
/dev/sda1                  1014M  194M  821M    20% /boot
tmpfs                      783M      0  783M     0% /run/user/1000

rootファイルシステムはディフォルトで15Gb ですので拡張します。
記録した最上層部( / )のroot理論ボリュームを拡張します。(上記フォームにてご自身のファイルパスに変更してください。)

[webmaster@www ~]$ sudo lvextend -l +100%FREE /dev/fedora/fedora-root

記録した最上層部( / )のrootファイルシステムを拡張します。

[webmaster@www ~]$ sudo xfs_growfs /dev/fedora/fedora-root

一般ユーザーの作成

rootユーザーにログインします。

[webmaster@www ~]$ su -
パスワード:
[root@www ~]#

一般ユーザーを作成します。(初期設定では一般ユーザーは必要ありません。)

[root@www ~]# useradd ユーザー名

パスワードを設定します。

[root@www ~]# passwd ユーザー名
新しいパスワード:
新しいパスワードを再入力してください:

rootになれるユーザーを限定

rootになれるユーザーを限定します。

[root@www ~]# usermod -G wheel webmaster
[root@www ~]# vi /etc/pam.d/su

#を削除してコメント解除

#%PAM-1.0
auth            sufficient      pam_rootok.so
# Uncomment the following line to implicitly trust users in the "wheel" group.
#auth           sufficient      pam_wheel.so trust use_uid
# Uncomment the following line to require a user to be in the "wheel" group.
auth            required        pam_wheel.so use_uid
auth            substack        system-auth
auth            include         postlogin
account         sufficient      pam_succeed_if.so uid = 0 use_uid quiet
account         include         system-auth
password        include         system-auth
session         include         system-auth
session         include         postlogin
session         optional        pam_xauth.so

一般ユーザーの削除

ユーザーのみ削除する場合

[root@www ~]# userdel ユーザー名

ホームディレクトリも削除する場合

[root@www ~]# userdel -r ユーザー名

ファイアウォールとSELinuxを無効化

ファイアウォールサービス停止します。

[root@www ~]# systemctl stop firewalld

自動起動設定を無効にします。

[root@www ~]# systemctl disable firewalld
rm '/etc/systemd/system/dbus-org.fedoraproject.FirewallD1.service'
rm '/etc/systemd/system/basic.target.wants/firewalld.service'

SELinux を無効にします。

[root@www ~]# vi /etc/selinux/config

disabled に変更します。

# This file controls the state of SELinux on the system.
# SELINUX= can take one of these three values:
# enforcing - SELinux security policy is enforced.
# permissive - SELinux prints warnings instead of enforcing.
# disabled - No SELinux policy is loaded.
SELINUX=disabled #変更
# SELINUXTYPE= can take one of these two values:
# targeted - Targeted processes are protected,
# minimum - Modification of targeted policy. Only selected processes are protected.
# mls - Multi Level Security protection.
SELINUXTYPE=targeted

再起動します。

[root@www ~]# reboot

ネットワークの設定

IPv6 を無効にします。

[root@www ~]# vi /etc/default/grub

6行目:「ipv6.disable=1」を追加します。

GRUB_CMDLINE_LINUX="ipv6.disable=1 rd.lvm.lv=linuxserver/root..

変更を反映します。

[root@www ~]# grub2-mkconfig -o /boot/grub2/grub.cfg
[root@www ~]# reboot

ルーター設定

ルーターでDHCP固定IPアドレス設定ができる場合は「MACアドレス」、「サーバーIPアドレス」を設定します。

DHCP固定IPアドレス設定

MACアドレス(例:0c:2e:48:2b:dg:f4)

サーバーIPアドレス:192.168.1.3

システムの最新化

システムを最新化します。

[root@www ~]# dnf -y update

モジュールを追加

Node.js をインストールします。

[root@www ~]# sudo yum -y install gcc-c++ make nodejs

モジュールを確認します。

[root@www ~]# node -v
v16.14.0

パッケージ自動更新設定

dnf-automaticをインストールします。

[root@www ~]# dnf install dnf-automatic dnf-utils -y

dnf-automaticを設定します。

[root@www ~]# vi /etc/dnf/automatic.conf

自動ダウンロード&自動アップデートを行うようにする

# Whether updates should be applied when they are available, by
# dnf-automatic.timer. notifyonly.timer, download.timer and
# install.timer override this setting.
apply_updates = yes #変更

パッケージ自動更新自動起動設定

[root@www ~]# systemctl enable --now dnf-automatic.timer

Web 管理コンソールの設定

Cockpit を有効にして Web 管理コンソールが利用可能にします。

[root@www ~]# systemctl enable --now cockpit.socket
[root@www ~]# ss -napt
State Recv-Q Send-Q Local Address:Port Peer Address:Port 
LISTEN 0 128 0.0.0.0:22 0.0.0.0:* users:(("sshd",pid=831,fd=6)) 
LISTEN 0 128 [::]:22 [::]:* users:(("sshd",pid=831,fd=8)) 
LISTEN 0 128 *:9090 *:* users:(("systemd",pid=1,fd=24)) 

クライアントPCのWebブラウザで、[http://192.168.1.3:9090/] へアクセスし「root」でログインします。

Vim(テキストエディタ)の設定

Vim(テキストエディタ)をインストールします。

[root@www ~]# dnf -y install vim-enhanced

コマンドエイリアスを適用します。

[root@www ~]# vi /etc/profile

最終行に追記します。

alias vi='vim'

変更を反映します。

[root@www ~]# source /etc/profile

vim の設定します。

[root@www ~]# vi ~/.vimrc

行番号を表示する(サーバー設定を行番号で説明いたします。)

set number

Sudo(root権限)のを設定

root権限を特定のユーザーに設定します。

[root@www ~]# visudo

最終行に追記します。

webmaster    ALL=(ALL)       ALL

Fedora35:SSHサーバー設定

SSHサーバーのインストール

サーバーにwebmasterでログインします。

localhost login: webmaster
password:

rootでログインします。

[webmaster@localhost ~]$ us -
password:

SSHサーバーをインストールします。

[root@localhost ~]# dnf install openssh-server openssh-clients

SSHサーバーを起動します。

[root@localhost ~]# systemctl start sshd

SSHサーバーを自動起動設定をします。

[root@localhost ~]# systemctl enable sshd

SSHサーバーの作動確認します。

[root@localhost ~]# systemctl status sshd
● sshd.service - OpenSSH server daemon
   Loaded: loaded (/usr/lib/systemd/system/sshd.service; enabled; vendor preset>
   Active: active (running) since Sun 2021-04-11 18:03:51 JST; 5h 16min ago
     Docs: man:sshd(8)
           man:sshd_config(5)
 Main PID: 870 (sshd)
    Tasks: 1 (limit: 23603)
   Memory: 4.6M
   CGroup: /system.slice/sshd.service
           mq870 /usr/sbin/sshd -D -oCiphers=aes256-gcm@openssh.com,chacha20-po>

 4月 11 18:03:51 localhost.localdomain systemd[1]: Starting OpenSSH server daem>
 4月 11 18:03:51 localhost.localdomain sshd[870]: Server listening on 0.0.0.0 p>
 4月 11 18:03:51 localhost.localdomain sshd[870]: Server listening on :: port 2>
 4月 11 18:03:51 localhost.localdomain systemd[1]: Started OpenSSH server daemo>
 4月 11 22:29:36 localhost.localdomain sshd[5425]: Accepted password for webmas>
 4月 11 22:29:36 localhost.localdomain sshd[5425]: pam_unix(sshd:session): sess>
 4月 11 23:19:30 localhost.localdomain sshd[5481]: Accepted password for webmas>
 4月 11 23:19:30 localhost.localdomain sshd[5481]: pam_unix(sshd:session): sess>
lines 1-19/19 (END)

「q」を押下して表示を終了します。

現在のネットワーク設定を確認

ネットワーク設定でIPアドレスを記録します。

webmaster@www:~$ ip addr
span style="color: #ffffff;">1: lo: <LOOPBACK,UP,LOWER_UP> mtu 65536 qdisc noqueue state UNKNOWN group default qlen 1000
link/loopback 00:00:00:00:00:00 brd 00:00:00:00:00:00
inet 127.0.0.1/8 scope host lo
valid_lft forever preferred_lft forever
inet6 ::1/128 scope host
valid_lft forever preferred_lft forever
2: enp14s0: <BROADCAST,MULTICAST,UP,LOWER_UP> mtu 1500 qdisc mq state UP group default qlen 1000
link/ether 0c:2e:48:2b:dg:f4 brd ff:ff:ff:ff:ff:ff
inet 192.168.1.3/24 brd 192.168.1.255 scope global dynamic enp2s0 #IPアドレス、インターファイス名記録
valid_lft 11984sec preferred_lft 11984sec
inet6 20sd:ahq23:46dg:7rh9:2dg5:28uf:fls4:dehd/64 scope global dynamic mngtmpaddr noprefixroute
valid_lft 13592sec preferred_lft 11792sec
inet6 fft0::21fg3:2j8f:fo60:djed/64 scope link
valid_lft forever preferred_lft forever

192.168.1.3」(記録したIPアドレス)でクライアントPCよりTera Termで接続します。

Fedora35:インストール

Fedora35ダウンロード

ダウンロードページからインストールディスクイメージ(Fedora-Server-dvd-x86_64-35-1.2.iso)をダウンロードします。

インストールDVD作成

ImgBurnを使いFedora-Server-dvd-x86_64-35-1.2.isoでFedora35インストールディスクを作成します。

Fedora35インストール

インストール前にBIOSでDVDブートができるように設定します。

ご自身のサーバーの設定方法をメーカーサイトでお調べください。

作成したインストールDVDでインストールします。

下の画面が表示されたらキーボードの「Enter」を押下します。

「日本語」を選択して「続行」をクリックします。

「キーボード」で日本語に設定します。

「言語サポート」で日本語(日本)に設定します。

「日付と時刻」でアジア/東京 タイムゾーンに設定します。

「ソフトウェアの選択」をクリックします。

「Fedora Server Edition」を選択して「完了」をクリックします。

「インストール先」で自動パーティションを選択します。

「ネットワークとホスト名」をクリックします。

「ホスト名」をfedoraserver.jpに変更して「適用」をクリックします。

「設定」をクリックします。

「IPv4のセッティング」をクリックします。

方式の「手動」を選択します。

「追加」をクリックして、「アドレス」に192.168.1.3 、「ネットマスク」に24 、「ゲートウェイ」に192.168.1.1を入力します。

「DNSサーバー」に192.168.1.1を入力します。

「保存」をクリックします。

「オン」を選択します。

「完了」をクリックします。

「rootパスワード」をクリックします。

「rootアカウントを有効化」を選択し、「rootパスワード」を入力します。

「完了」をクリックします。

「ユーザーの作成」をクリックします。

「フルネーム」「ユーザーネーム」にwebmasterを入力します。

「このユーザーを管理者にする」を選択します。

「このアカウントを使用する場合にパスワードを必要とする」を選択します。

「パスワード」を入力します。

「完了」をクリックします。

「インストール開始」をクリックします。

Fedora35:アップグレード

アップグレード

クライアントPC(Windows)でTera Termを起動します。

Tera Termの使い方

バックアップ設定を行います。

バックアップ設定

最新版のパッケージをインストールします。

[root@www ~]# dnf upgrade --refresh

再起動します。

[root@www ~]# shutdown -r now

ツールをインストールします。

[root@www ~]# dnf install dnf-plugin-system-upgrade
[root@www ~]# dnf system-upgrade download --refresh --releasever=35

指示に従ってコマンドを実行した後、再インストールします。

[root@www ~]# dnf system-upgrade download --refresh --releasever=35

アップグレードします。

[root@www ~]# dnf system-upgrade reboot

アップグレードを確認します。

[root@www ~]# cat /etc/os-release;
NAME=Fedora
VERSION="35 (Server Edition Prerelease)"

Fedora34:起動不能をインストールDVDで復旧

起動不能をインストールDVDで復旧

起動不能をインストールDVDで復旧します。

インストールDVDを投入して起動後、「Troubleshooting」を選択し「Enter」キーを押下します。

「Rescue a Fedora system」を選択し「Enter」キーを押下します。

「1」(continue)を入力し「Enter」キーを押下します。

「Enter」キーを押下します。

インストールDVDを取り出して、「reboot」と入力して、「Enter」キーを押下します。

起動を確認します。

Fedora34:ログ解析設定

Webアクセスログ解析(AWStats)のインストール

AWstatsをインストールします。

[root@www ~]# dnf -y install awstats

自動作成されているawstats.fedoraserver.jp.conf を設定します。

[root@www ~]# vi /etc/awstats/awstats.fedoraserver.jp.conf 

126行目:変更します。

LogFormat=

157行目:ホスト名を設定します。

SiteDomain="fedoraserver.jp"

172行目:除外したいドメイン名やIPアドレスを追記します。

HostAliases="localhost 127.0.0.1 REGEX[^.*fedoraserver\.jp$] REGEX[^192\.168\.1\.]"

awstats.confを設定します。

[root@www ~]# vi /etc/httpd/conf.d/awstats.conf

30行目:アクセス許可IPを追記します。

        Require ip 192.168.1.1/24

再起動します。

[root@www ~]# systemctl restart httpd

1時間毎に自動更新する設定をします。

[root@www ~]# /usr/share/awstats/wwwroot/cgi-bin/awstats.pl -config=fedoraserver.jp -update

Web ブラウザを起動し、「http://fedoraserver.jp/awstats/awstats.pl」にアクセスして、作動確認します。

awstats

メールログ解析(Pfiogsumm)のインストール

pflogsumm をインストールします。

[root@www ~]# dnf -y install postfix-perl-scripts

メールログのサマリーを出力します。

[root@www ~]# perl /usr/sbin/pflogsumm -d yesterday /var/log/maillog
Postfix log summaries for Jul 29

Grand Totals
------------
messages

      8   received
      8   delivered
      2   forwarded
      1   deferred  (1  deferrals)
      0   bounced
      0   rejected (0%)
      0   reject warnings
      0   held
      0   discarded (0%)

   2428k  bytes received
   2429k  bytes delivered
      3   senders
      2   sending hosts/domains
      2   recipients
      2   recipient hosts/domains


Per-Hour Traffic Summary
------------------------
    time          received  delivered   deferred    bounced     rejected
    --------------------------------------------------------------------
    0000-0100           0          0          0          0          0
    0100-0200           0          0          0          0          0
    0200-0300           0          0          0          0          0
…

root宛てにメール送信する設定をします。

[root@www ~]# crontab -e

毎日午前1時にメール送信する設定をします。

[root@www ~]# 00 01 * * * perl /usr/sbin/pflogsumm -e -d yesterday /var/log/maillog | mail -s 'Logwatch for Postfix' root

Fedora34:システム監視設定

Nagiosのインストール

Nagiosに必要なgd-develをインストールします。

root@www:~# dnf -y install gd-devel

nagiosユーザーを作成します。

root@www:~# useradd -d /usr/local/nagios/ -M nagios

Nagiosをダウンロードします。

root@www:~# wget https://github.com/NagiosEnterprises/nagioscore/releases/download/nagios-4.4.6/nagios-4.4.6.tar.gz

Nagiosを展開します。

root@www:~# tar zxvf nagios-4.4.6.tar.gz

Nagios展開先ディレクトリへ移動します。

root@www:~# cd nagios-4.4.6

patchをインストールします。

root@www:~# dnf -y install patch

Nagios日本語化パッチをダウンロードします。

root@www:nagios-4.4.6# wget http://ftp.momo-i.org/pub/security/nagios/patches/nagios-jp-4.4.6.patch.gz

Nagios日本語化パッチを施行します。

root@www:nagios-4.4.6# gzip -dc nagios-jp-4.4.6.patch.gz |patch -p1

Nagiosをインストールします。

root@www:nagios-4.4.6# ./configure && make all && make fullinstall && make install-config

ディレクトリを抜けます。

root@www:nagios-4.4.6# cd

Nagios展開先ディレクトリを削除します。

root@www:~# rm -rf nagios-4.4.6

ダウンロードしたファイルを削除します。

root@www:~# rm -f nagios-4.4.6.tar.gz

Nagiosプラグインインストール

Nagiosプラグインをダウンロードします。

root@www:~# wget https://github.com/nagios-plugins/nagios-plugins/releases/download/release-2.3.3/nagios-plugins-2.3.3.tar.gz

Nagiosプラグインを展開します。

root@www:~# tar zxvf nagios-plugins-2.3.3.tar.gz

Nagiosプラグイン展開先ディレクトリへ移動します。

root@www:~# cd nagios-plugins-2.3.3

Nagiosプラグインをインストールします。

root@www:nagios-plugins-2.3.3# ./configure && make && make install

ディレクトリを抜けます。

root@www:nagios-plugins-2.3.3# cd

Nagiosプラグイン展開先ディレクトリを削除します。

root@www:~# rm -rf nagios-plugins-2.3.3

ダウンロードしたファイルを削除します。

root@www:~# rm -f nagios-plugins-2.3.3.tar.gz

Nagios設定

nagios.cfgを設定します。

root@www:~# vi /usr/local/nagios/etc/nagios.cfg

51行目:行頭の「#」を削除してコメント解除し、サーバー監視設定有効化の設定します。

cfg_dir=/usr/local/nagios/etc/servers

1096:行目:日付書式をYYYY-MM-DD HH:MM:SSにするを設定します。

date_format=iso8601

サーバー監視設定ファイル格納ディレクトリを作成します。

root@www:~# mkdir /usr/local/nagios/etc/servers

contacts.cfgを設定します。

root@www:~# vi /usr/local/nagios/etc/objects/contacts.cfg

32行目:管理者メールアドレスを指定を設定します。

define contact{
        contact_name                    nagiosadmin             ; Short name of user
        use                             generic-contact         ; Inherit default values from generic-contact template (defined above)
        alias                           Nagios Admin            ; Full name of user

        email                           root@localhost
        }

localhost.cfgを設定します。

root@www:~# vi /usr/local/nagios/etc/objects/localhost.cfg

144行目:SSH状態変化時に通知するを設定します。

define service{
        use                             local-service         ; Name of service template to use
        host_name                       localhost
        service_description             SSH
        check_command                   check_ssh
        notifications_enabled           1
        }

158行目:SSH状態変化時に通知するを設定します。

define service{
        use                             local-service         ; Name of service template to use
        host_name                       localhost
        service_description             HTTP
        check_command                   check_http
        notifications_enabled           1
        }

commands.cfgを設定します。

root@www:~# vi /usr/local/nagios/etc/objects/commands.cfg

29行目:nkfコマンドのメール本文文字化け対策の設定します。

# 'notify-host-by-email' command definition
define command{
        command_name    notify-host-by-email
        command_line    /usr/bin/printf "%b" "***** Nagios *****\n\nNotification Type: $NOTIFICATIONTYPE$\nHost: $HOSTNAME$\nState: $HOSTSTATE$\nAddress: $HOSTADDRESS$\nInfo: $HOSTOUTPUT$\n\nDate/Time: $LONGDATETIME$\n" | /usr/bin/nkf -j | /usr/bin/mail -s "** $NOTIFICATIONTYPE$ Host Alert: $HOSTNAME$ is $HOSTSTATE$ **" $CONTACTEMAIL$
        }

37行目:nkfコマンドのメール本文文字化け対策の設定します。

# 'notify-service-by-email' command definition
define command{
        command_name    notify-service-by-email
        command_line    /usr/bin/printf "%b" "***** Nagios *****\n\nNotification Type: $NOTIFICATIONTYPE$\n\nService: $SERVICEDESC$\nHost: $HOSTALIAS$\nAddress: $HOSTADDRESS$\nState: $SERVICESTATE$\n\nDate/Time: $LONGDATETIME$\n\nAdditional Info:\n\n$SERVICEOUTPUT$\n" | /usr/bin/nkf -j | /usr/bin/mail -s "** $NOTIFICATIONTYPE$ Service Alert: $HOSTALIAS$/$SERVICEDESC$ is $SERVICESTATE$ **" $CONTACTEMAIL$
        }

Apache httpd設定

Nagios用Apache httpd設定ファイルを設定します。

root@www:~# vi /etc/httpd/conf.d/nagios.conf

16行目:追記します。

      <RequireAny>

17行目:行頭に「#」を追記してコメント化し、内部からのみアクセス可能にする設定をします。

#         Require all granted

19行目:内部ネットワーク(192.168.1.1/24)からのみアクセス可能にする設定をします。

         Require ip 192.168.1.1/24

20行目:追記します。

      </RequireAny>

49行目:追記します。

      <RequireAny>

50行目:行頭に「#」を追記してコメント化し、内部からのみアクセス可能にする設定をします。

#         Require all granted

52行目:内部ネットワーク(192.168.1.1/24)からのみアクセス可能にする設定をします。

         Require ip 192.168.1.1/24

53行目:追記します。

      </RequireAny>

Webサーバー設定反映を設定します。

root@www:~# systemctl restart httpd

Nagios管理ユーザー(nagiosadmin)を作成します。

root@www:~# htpasswd -c /usr/local/nagios/etc/htpasswd.users nagiosadmin

パスワードを設定します。

New password:
Re-type new password:
Adding password for user nagiosadmin

Nagios起動

起動します。

root@www:~# systemctl restart nagios

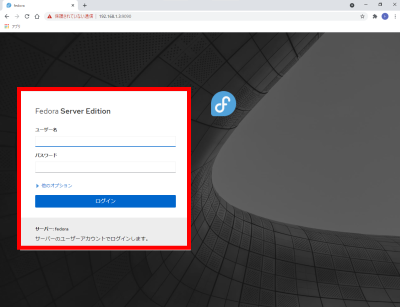
Webブラウザを起動し、「http://ubuntuserver.jp/nagios/」にアクセスし、管理ユーザー:nagiosadmin、登録済パスワードでログインして動作確認をします。

nagios